Tie Fighter Pilot: Introduction
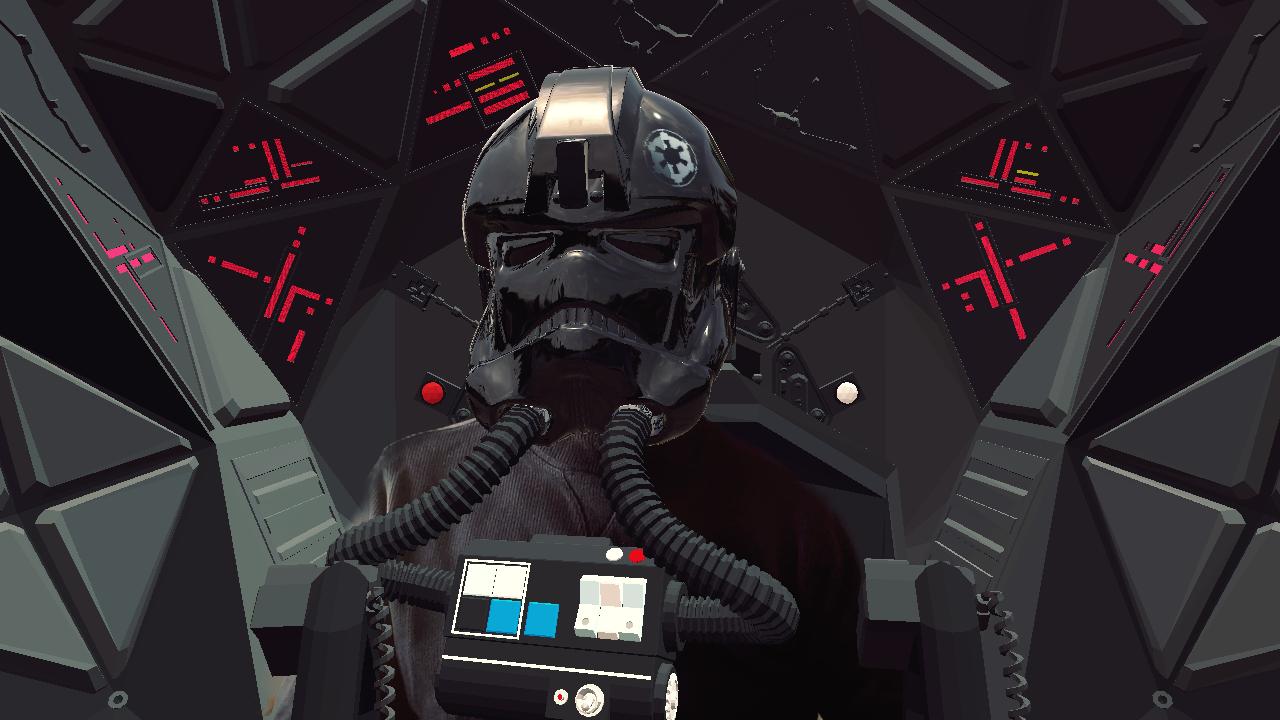
During the pandemic, my students kept popping up on Zoom classes as potatoes, babies, and all manner of monsters. Happy that they were exploring technology, I asked them how they were doing it, and they excitedly told me about Snap Camera. I of course downloaded it and begin giving classes as Luke Skywalker. This gave me an idea: could I make my own Tie Fighter Pilot Snapchat Lens?
Of course I could! So I set about making some digital cosplay. I’ve always wanted to be a Tie Fighter Pilot. The Empire had the coolest stuff (and frankly, didn’t do anything wrong).
Gathering the Parts
The first thing to do was to collect all the parts. I wanted to make the experience as immersive as a vertical-video Snapchat filter could be, which meant 3D models and some good post-processing. I’m not the best at CADing complex items, so I sought out to find some models that I could borrow from the web. I was fortunate that James R. Bassett had put together a perfect model for this project. You can find it on his website, as well as a few other neat models he has made.
In order to make the filter light and lean, I cut down on the unnecessary geometry of the tie fighter in Blender. See below:
Then, it was time for the helmet. Luckily again, there was a great model by Michael Boitte over on Sketchfab that I was able to download and use.
Finally, we needed some good tie fighter sounds. Time to head over to youtube and find 12 hours of it.
Building the Project
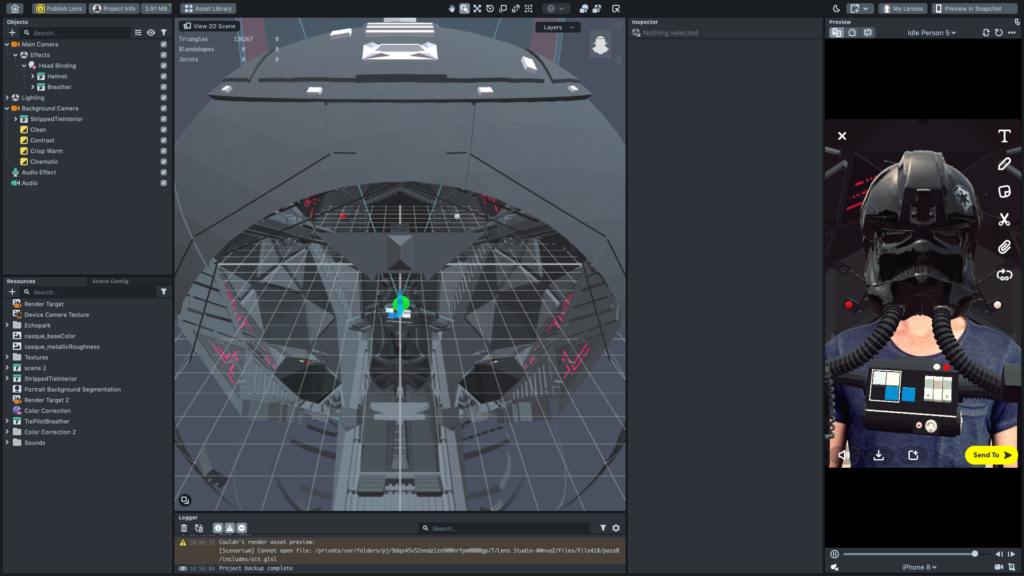
Because I wanted the user to sit inside the cockpit and also wear the helmet, I needed a way to mask around the head and shoulders of the person with the background geometry. To accomplish this, we need to use Portrait Background Segmentation and set up two different cameras for our scene:
- Background camera to handle the scene geometry, and
- Main camera to handle the head tracking.
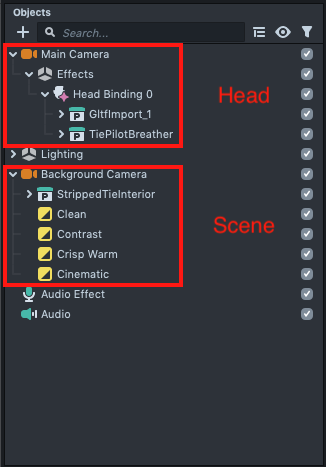
As you can see in the first image, we have two separate cameras set up. Each piece of geometry for that camera is made a child of each respective camera. Also, it is important to set the layer of each piece of geometry in the Background Camera to the same culling layer as the Background Camera. This way, we are tricking the Background Camera into seeing only what we want it to see: the scene geometry.
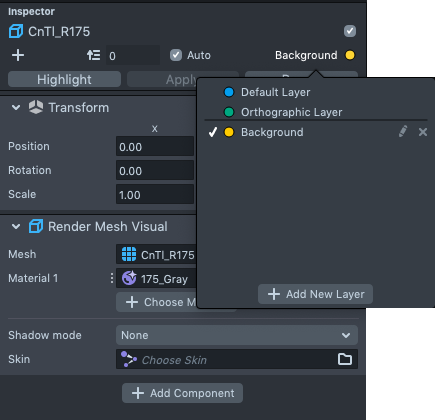
Background Camera
This part is a little bit tricky because we need to flatten our 3D geometry into something we can mask with a portrait mask. Here are the steps to accomplishing this:
- Create a Portrait Background Segmentation in the resources panel to act as the mask.
- Under Type in the inspector window, choose “Portrait Background.” This will make it a head and shoulders mask.
- Create two Render Textures for each camera to render onto (in my case: Render Texture and Render Texture 2).
- Set the Background Camera to cull only the Background layer
- Set the Background Camera’s Render Target to the Render Texture 2
- Set the Background Camera’s Mask to the Portrait Background Segmentation Mask you created in steps 1-2.
- Set the Main Camera’s Input to the Render Texture 2. This passes what the Background Camera sees to the Main Camera.
- And finally, Main Camera’s Render Target to Render Target.
Essentially, we are using one camera to look at the scene geometry and project what it sees as a flattened background into the Main Camera. See below for how the two cameras should be set up.
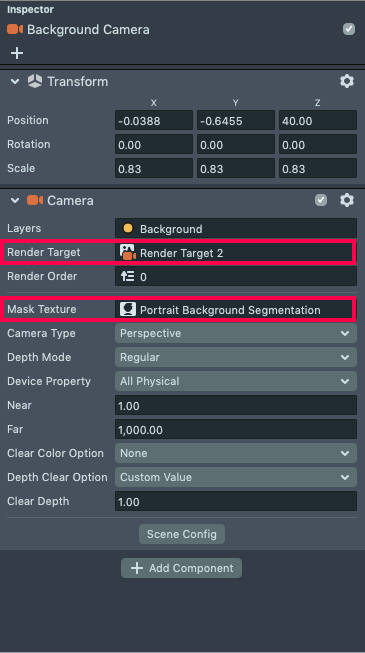
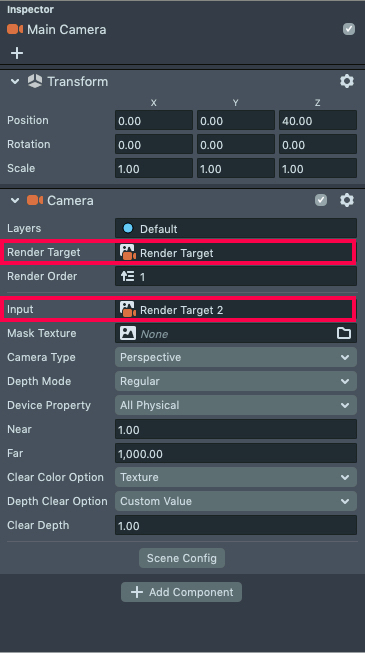
Main Camera
Now that the background is set, it’s time to move onto placing the helmet on the user’s head. In order to do this we need to add a Head Binding object inside the Main Camera. See Below:

Anything that is a child of the Head Binding object automatically tracks with the user’s head. Therefore, all we need to do is attach both the helmet and the breathing tubes and box as a child of the Head Binding object and we should have tracking.

Move the objects around until they look nice and we’re almost there! Next, we need to add in some neat post processing.
Post Processing
What’s really neat about Lens Studio is the ability to stack post-processing modules onto each other to get some really neat looking effects. I wanted it to come out looking dark and cinematic, so I added the following onto the Background Camera:
- Clean
- Contrast
- Crisp Warm
- Cinematic
Audio
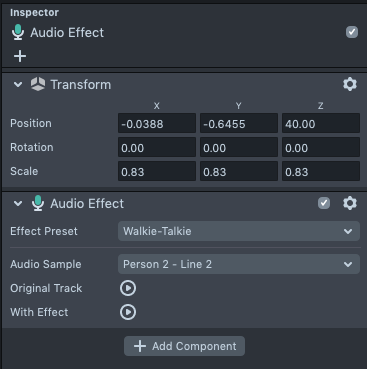
Finally, it’s time for some audio. I wanted it to sound as authentic as possible, so I wanted to add in both a looped portion and a voice effect portion. Luckily, Lens Studio makes this pretty easy. Add both an Audio and Audio Effect component to the objects panel and then set them accordingly.
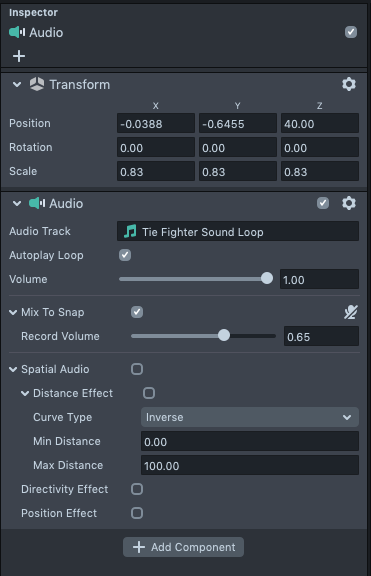
Wrapping Up
And now it was time to publish. This was a really fun project and a great way to learn how to use Lens Studio. The documentation at Snapchat is really helpful to getting it all sorted. I can’t wait to do another!
